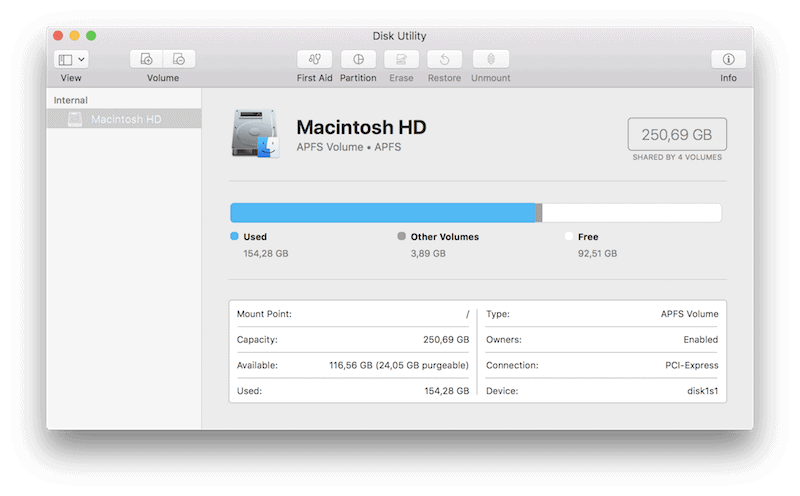
Formatting a disk mostly applies to situations when you purchase a new external hard drive or flash disk and want to format it to ensure full macOS compatibility with either the Mac OS Extended or the new APFS file system introduced with macOS 10.13 High Sierra. Installing Windows on your Mac also requires partitioning a storage disk and changing the volume’s disk format.
To format a disk, you’ll need to launch Disk Utility and pick one of the available options. When you select the format you want to use you are actually selecting a file system type, so consider the purpose of that drive: will you want to share its contents with Windows users, or not?
Formatting a disk is a straightforward process with Disk Utility:

5. Give the drive a name in the required field, and select the format from the contextual menu. Select APFS if used with a Mac running macOS High Sierra, Mac OS Extended (Journaled) on most other Macs, or NTFS/MS-DOS if you want the drive to be accessible by Windows users.
6. Select the GUID partition map.
7. Click on the Erase button to format the drive.
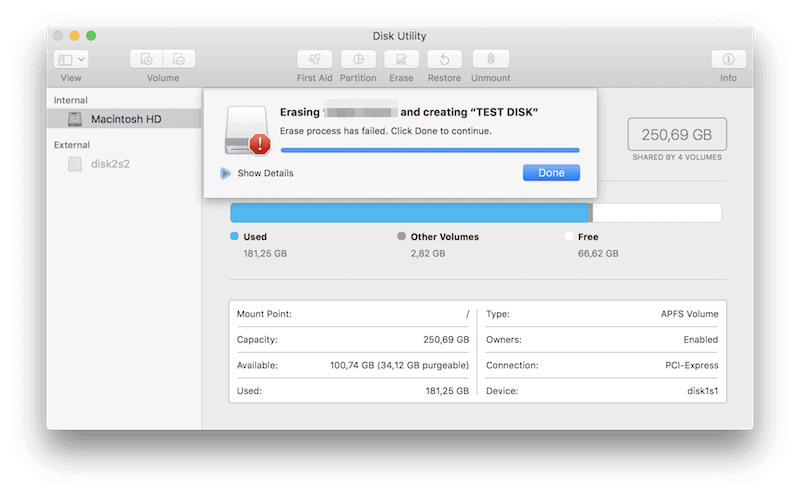
And that’s it! However, there is one extra thing to consider: users running macOS High Sierra will likely get an error when trying to erase the disk and applying a different file format type. This is because Apple has hidden the Map options by default. Without selecting a map scheme it won’t be possible to format the disk. To address this you need to click on the “View” button in the top left of Disk Utility and select “Show All Devices”.
With this option selected the Map scheme options will appear and you will be able to pick from any of the following:
In most cases the Map scheme that should be selected will be the GUID Partition Map. Doing so should mean that the disk formatting process will go smoothly, but if it doesn’t then try running First Aid to check whether the attached drive is healthy.

If you want to format a hard drive or flash storage so that it will be compatible with both macOS and Windows computers, then the easiest option is to select the MS-DOS (FAT) format. Remember that you might need to select the Master Boot Record map scheme to ensure compatibility with older versions of Windows.
This file system, however, includes some limitations, such as a file-size limit. It won’t be possible to move files larger than 4GB onto the external drive with this formatting. To address this issue you’ll need to select the NTFS file system, but the downside of this format is that macOS cannot write to it, which means that you won’t be able to copy files to that disk.
The only workaround is to install an NTFS driver on your machine, such as Paragon NTFS for Mac. This tiny piece of software will streamline your daily workflow, since it enables full NTFS read/write compatibility and hence copying large files to an NTFS-formatted external drive will no longer be an issue.
Share your thoughts, ask questions, and connect with other users. Your feedback helps our community make better decisions.
©2012-2026 Best Reviews, a clovio brand –
All rights
reserved